
Clean the print cartridge contacts
Clean the print cartridge contacts only if you get repeated messages on the control
panel display prompting you to check a print cartridge after you already have cleaned
or aligned the print cartridges.
Before cleaning the print cartridge contacts, remove the print cartridge and verify that
nothing is covering the print cartridge contacts, then reinstall the print cartridge. If you
continue to get messages to check the print cartridges, clean the print cartridge
contacts.
Make sure you have the following materials available:
●
Dry foam rubber swabs, lint-free cloth, or any soft material that will not come
apart or leave fibers.
Tip
Coffee filters are lint-free and work well for cleaning print cartridges.
●
Distilled, filtered, or bottled water (tap water might contain contaminants that can
damage the print cartridges).
Caution
Do not use platen cleaners or alcohol to clean the print cartridge
contacts. These can damage the print cartridge or the HP All-in-One.
User Guide
163
Maintain your HP
All-in-One
To clean the print cartridge contacts
1.
Turn on the HP All-in-One and open the print-carriage access door.
The print carriage is on the far right side of the HP All-in-One.
2.
Wait until the print carriage is idle and silent, and then unplug the power cord
from the back of the HP All-in-One.
Caution
When you unplug the power cord for more than 72 hours, the
date and time are erased. You will need to reset the date and time later,
when you plug the power cord back in. For more information, see
Set the
date and time
. Any faxes stored in memory are also erased.
3.
Lift one of the latches to the open position, and then remove the print cartridge.
Caution
Do not remove both print cartridges at the same time. Remove
and clean each print cartridge one at a time. Do not leave a print cartridge
outside the HP All-in-One for more than 30 minutes.
4.
Inspect the print cartridge contacts for ink and debris buildup.
5.
Dip a clean foam rubber swab or lint-free cloth into distilled water, and squeeze
any excess water from it.
6.
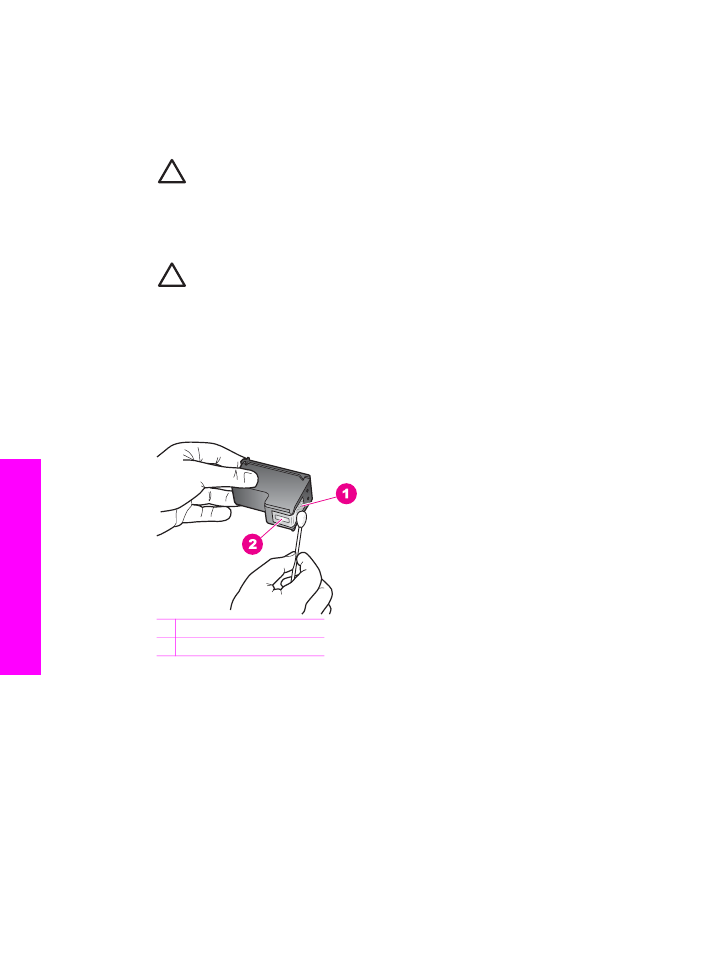
Hold the print cartridge by its sides.
7.
Clean only the copper-colored contacts. For information on cleaning the ink
nozzle area, see
Clean the area around the ink nozzles
.
1 Copper-colored contacts
2 Ink nozzles (do not clean)
8.
Allow the print cartridge to dry for approximately ten minutes.
9.
Place the print cartridge back into the print carriage slot and close the latch.
10. Repeat if necessary for the other print cartridge.
11. Gently close the print-carriage access door and plug the power cord into the back
of the HP All-in-One.